
i spent some time trying out this website and while i found the tutorial great, i didn't love fotoflexer.com as i'm used to using ipiccy.com. i figured ipiccy must have the same overlaying abilities so i checked it out. they do! and it's more user-friendly in my opinion.
if you want to start adding .png overlays to your photos - i thought i'd try my first tutorial post! (please click on the photos to see them larger!)
first, head over to ipiccy.com and click the yellow button at the bottom to Start Editing!

here's what my ipiccy looks like - it has kept all my photos that i've uploaded to it! very handy. yours will be empty. click "Upload photo".

this is what your page will look like with your newly uploaded photo:

to add your overlay, click on the fourth tab above your photo (see below in orange) - the Layers tab. once in the Layers tab, the four buttons will be in the toolbar: Photos, Sticker, Text, and Shape. choose "Photo".

a new sidebar will appear full of all your photos previously uploaded to ipiccy. mine is full but yours will be empty. choose "Add Photo" to upload your overlay.

when you downloaded your .png file, it may have been in a .zip drive. your .png files need to be OUT of the zip drive and into the file folder before you can use them here. i'm going to choose the Ali Edwards "growing" overlay from my file here and press "open".

here is the GROWING overlay in my sidebar! (next to my cute freebie overlay from A Vegas Girl At Heart)

simply DRAG it over to your photo! easy! a new sidebar will pop up with that new layer.
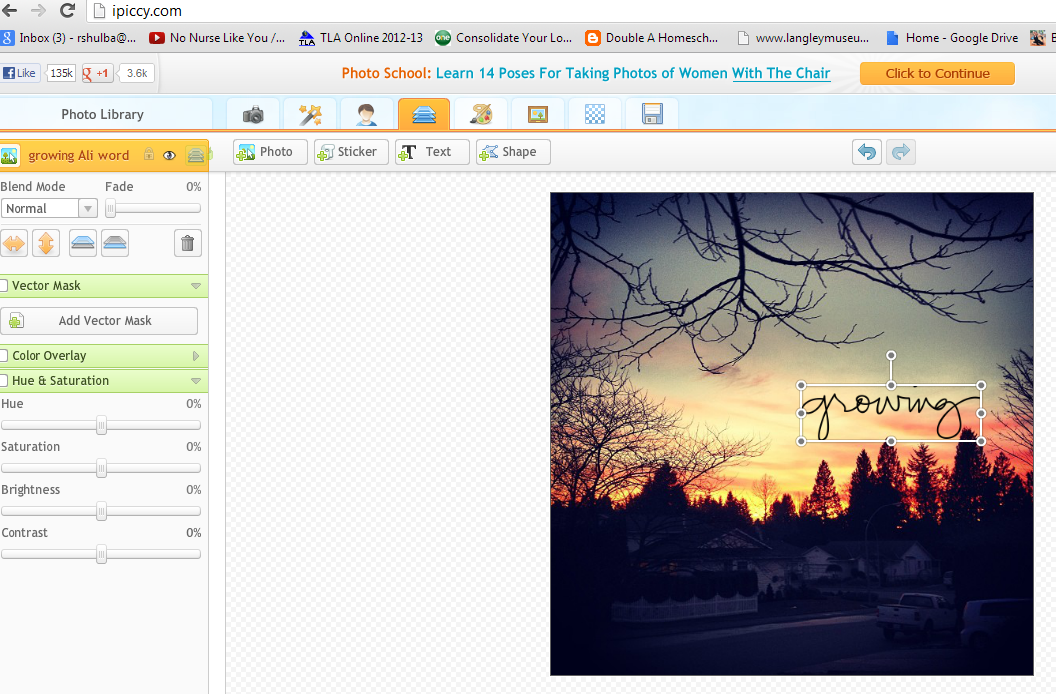
to make it see through, select the overlay on the photo (as you see it selected above) then go to the sidebar and at the top in "Blend Mode", it says Normal. Click the down arrow and choose "Overlay".

Your overlay will be see through and you can use the "Fade" to change this. There are also many other features within this sidebar to play with!

When you're finished in the Layers Tab, click the orange "Done" button in the top right corner and this will take you back to the main photo tab. Now, if you're finished, click the Disk tab (down the row from the Layers tab) to Save.
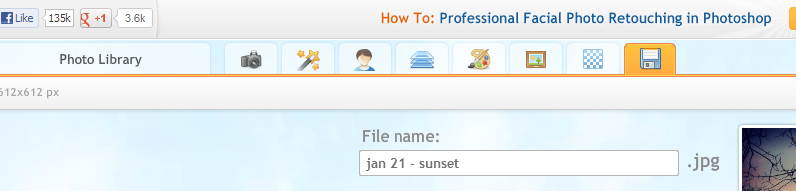
That little disk will take you to this page where you can rename your photo whatever you like and save it into the correct file. And you're finished!


1 comment:
I have no idea what you're talking about, photo overlays and .png or whatever, but the new blog layout looks GREAT! :)
Post a Comment